
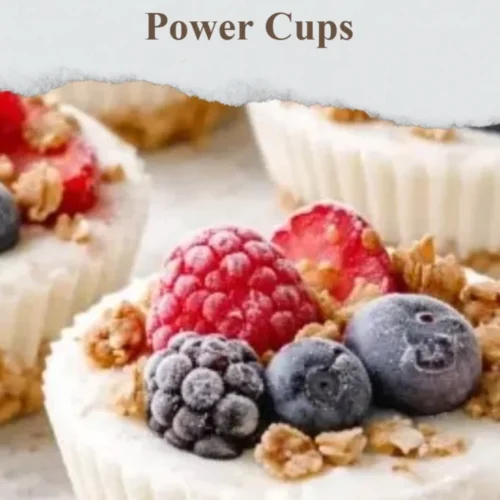
Frozen Yogurt Granola Power Cups
Frozen Yogurt Granola Power Cups: Your New Go-To Snack!
Are you tired of the same old boring snacks? Looking for something that satisfies your sweet tooth while keeping the nutrition in check? Well, grab your spoons and get ready to whip up some Frozen Yogurt Granola Power Cups—the perfect blend of creamy, crunchy, and oh-so-delicious. This recipe not only caters to your cravings but also provides a fun way to power through your busy days, whether you’re juggling work and family or just trying to survive the never-ending laundry pile!
Why You’ll Love These Frozen Yogurt Granola Power Cups
Here’s the scoop: these power cups are a delightful mix of frozen yogurt and granola, making them a nutritious and delicious snack option. They’re effortlessly easy to make and can be customized to fit your taste buds. Consider them your new best friend in the freezer, ready to save the day when you need a quick pick-me-up… or just a tasty treat after dinner without the guilt! Plus, they’re adorable—who doesn’t love a cute little cup of yum?
Ingredients to Gather
Before we dive into the scrumptious details, here’s what you’ll need to create these power-packed cups:
- 2 cups Greek yogurt (vanilla or plain—totally your call!)
- 1 cup granola (go for your favorite brand or homemade!)
- 1/2 cup fresh fruit (think berries, sliced bananas, or what’s in season)
- 2 tablespoons honey or maple syrup (for that touch of sweetness)
- Dark chocolate chips or nuts (optional, but highly recommended!)
How to Make Frozen Yogurt Granola Power Cups
Step 1: Prep the Cups
Grab some muffin liners—you can use the standard size or the mini ones if you’re feeling fancy. Place them in a muffin tin to hold their shape and make serving super easy (no one likes a messy kitchen).
Step 2: Mix the Goodies
In a mixing bowl, combine Greek yogurt and honey or maple syrup. Feel free to taste it! (Don’t worry, you’re not alone; I may or may not have done this several times before.)
Step 3: Layer It Up
Spoon a generous layer of the yogurt mixture into each muffin liner. Then, be the artist you are and sprinkle granola on top, followed by fresh fruit. Think of it like stacking your favorite sundae but in a healthier format!
Step 4: Get Frozen
Pop these beauties into the freezer for about 4-6 hours or until they are nice and solid. Patience is vital here, ladies! (Pro tip: while you wait, take a mini dance break—win-win!)
Step 5: Serve and Enjoy
Once they’re frozen through, carefully peel away the muffin liners. Now, dig in! You can even drizzle a little extra honey on top or sprinkle extra granola for that crunch factor.
Cooking Tips for Your Power Cups
- If you want an extra dimension of flavor, try adding a pinch of cinnamon or vanilla extract to the yogurt mix.
- Feeling a bit adventurous? Mix in some nut butter before freezing for a creamy twist—just don’t blame me if you instantly want to make more!
- Have kids? Let them decorate their own cups with fruit and toppings—they’ll never know they’re eating something healthy!
Personal Anecdote
These Frozen Yogurt Granola Power Cups have become my secret weapon for family gatherings. Whenever I make a batch, they vanish faster than I can blink—seriously, one minute they’re there, and the next? It’s like they’ve been devoured by a hungry pack of wolves! My kids love them, and it’s nice knowing I’m serving them something wholesome amidst all the birthday cake chaos.
FAQ: Your Burning Questions Answered
Can I substitute Greek yogurt?
Absolutely! If you’re not a fan, try regular yogurt or even a dairy-free alternative like coconut yogurt.
How do I store leftovers?
Place any extras in an airtight container in the freezer. They should keep well for a couple of weeks!
Can I use frozen fruit instead?
Sure thing! Just thaw them first, and then they’re ready to go. Remember, though, this might give your yogurt a fun swirl effect!
With a snack this easy to make, you can wave goodbye to boring afternoon munchies. These Frozen Yogurt Granola Power Cups are here to revolutionize your snacking game one delicious bite at a time. So what are you waiting for? Grab your ingredients, channel your inner chef, and let’s make snack time something to look forward to!
And hey, while you’re at it, if you’re looking for other delicious yet straightforward recipes, check out my Quick Weeknight Dinners or indulge yourself with some Decadent Desserts—you deserve it!
Meta Description
"Frozen Yogurt Granola Power Cups are the perfect snack recipe for busy days. Quick, easy, and delicious—try it today!"
Now, don your chef hat and let’s create these little treasures! Happy snacking! 🍦💖
Frozen Yogurt Granola Power Cups
Ingredients
For the power cups
- 2 cups Greek yogurt (vanilla or plain) Use your preference of flavor
- 1 cup granola Choose your favorite brand or homemade
- 1/2 cup fresh fruit Berries, sliced bananas or in-season fruits work well
- 2 tablespoons honey or maple syrup For added sweetness
- Dark chocolate chips or nuts Optional, but recommended for added flavor
Instructions
Preparation
- Grab some muffin liners and place them in a muffin tin.
- In a mixing bowl, combine Greek yogurt and honey or maple syrup, adjusting to taste.
- Spoon a layer of the yogurt mixture into each muffin liner, followed by a sprinkle of granola and fresh fruit.
- Pop the muffin tin into the freezer for about 4-6 hours until solid.
- Once frozen, carefully peel away the muffin liners and serve.